Basic ReadyNAS setup for WebDAV Navigator
- I'm using RAIDiator 4.1.9 on a ReadyNAS Duo without any problems with WebDAV Navigator. All features appear to work including streaming media.

- To enable the ReadyNAS to serve content using WebDAV, go to the Shares, Shares Listing menu option in the left.
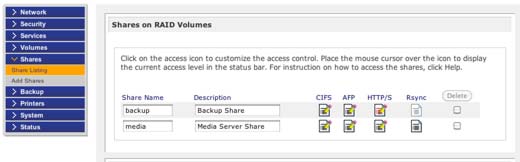
- Click on the HTTP/S icon for the share you want to configure.
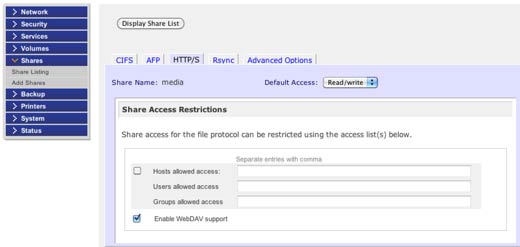
- Click the "Enable WebDAV Support" checkbox and select Read/Write from the drop down list.
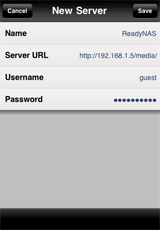
- In WebDAV Navigator enter the URL for your server share, in this case I'm accessing the media share.
The IP address of your ReadyNAS will vary depending on your network setup. The username and password can be configured in the ReadyNAS admin screens.
Configure ReadyNAS to support Sync and "infinite depth" queries
The standard ReadyNAS firmware 4.1.9 and lower don't support infinite depth webdav queries. These queries are used to list all files and subfolders within a folder. This allows WebDAV Nav to efficiently access the full content of a folder in a single call, making it an extremely efficient way to build the folder tree.
This feature is used when downloading complete folders and when syncing remote and local folders using WebDAV Nav
In order to add support to the standard firmware, you will unfortunately need to install an add-on that may void your warranty.
- Install the "Enable Root SSH Access" add-on from the ReadyNas site at http://www.readynas.com/?cat=36/ Select the correct architecture for your ReadyNAS device. The ReadyNAS duo is a Sparc based system.
- Load the admin interface for your ReadyNAS into a browser and go to the System, Update page
- Select the Local tab and locate the .bin file you downloaded. Upload and Verify the image, then reboot the device when prompted
- When restarted you can now SSH into the device using the 'root' user and the admin password you have assigned.
- Once in, change to the /etc/frontview/apache folder
- Using vi edit the Shares.conf file that has already been created by the system and add "DavDepthInfinity on" below the "Dav On" line,
Alias "/media" "/c/media"
<Location "/media">
  Options Indexes
  Order allow,deny
  Allow from all
  Require valid-user
  AuthType Basic
  AuthName "My Shares"
  Dav On
  DavDepthInfinity on
</Location>
- You now need to restart Apache in order for the configuration to take affect
  killall apache-ssl
  apache-ssl -f /etc/frontview/apache/httpd.conf
- You should now be able to use the Sync and Download folder features on your ReadyNAS from WebDAV Nav!